Glute medius kickbacks: you’ve probably seen plenty of video tutorials about this exercise on TikTok or YouTube.
BUT are glute medius kickbacks just a phase–OR are they as effective as everyone says they are?
To get to the point: glute medius kickbacks are a rage right now for one clear reason: THEY WORK!
The gluteus medius can be difficult to target in a workout. Most exercises tend to focus on the more prominent gluteus maximus –which is a much bigger muscle that loves to take all the attention.
But if you’re looking to:
- Target & isolate your glute medius
- Get bigger, more muscular glutes
- AND Improve performance and function for your gluteus medius…
…then this exercise deserves a spot in your leg and glute day.
It’s hands-down one of the best glute isolation exercises out there.
We're Back Muscle Solutions, and we specialize in empowering you to to massage, stretch, and strengthen muscles that plague people with back pain every day. The glute medius is one of those muscles, so we're right in our element here.
With our products, you can:
1) Stop spending loads of money at clinics.
2) Get educated on how YOU can help your own back.
3) Live that active lifestyle you want...without back pain limitations!
Today, we’ll dive in to what makes glute medius kickbacks so great and why YOU should add them in to your workout routine to get muscled-up glutes!
We’ll cover:
- Glute Medius Kickbacks: How to
- Glute Medius Kickbacks: 11 Pro Tips & Common Mistakes
- Gluteus Medius Resources (from us!)
- Gluteus Medius Massage
Glute Medius Kickbacks How To
Video tutorials are great, but sometimes it’s easier to just follow a written, step-by-step guide, so you don’t have to keep pushing pause.
Here’s the easiest explanation of how to perform glute medius kickbacks.
1) At a cable machine, set the pulley to knee height, and find an ankle attachment to use for your right ankle.
2) Stand facing the cable machine with your non-working (left) leg directly in front of the pulley.
3) Angle your feet just slightly to the right side (30 degrees).
4) You can choose to keep your torso upright or slightly bent over. Support your torso by holding on to the cable machine with the arm on the non-working (left) side.
5) Use your glute to kick your right leg both back and out–also at about 30 degrees. Pause slightly at the top of this motion.
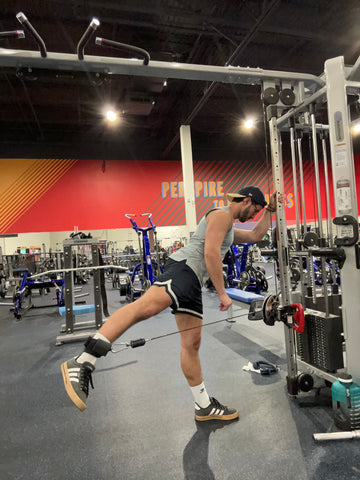
6) Then, slowly and controlled, bring it back across your body–crossing over the non-working (left leg).

7) Repeat for 10-15 reps.
8) Then, repeat on the other (left) leg.
And just like that, you’ve performed your first gluteus medius kickback!
Glute Medius Kickbacks: 11 Pro Tips & Common Mistakes
BUT just because you know the basics, followed a TikTok video, or read the 8 steps in the glute medius kickbacks how-to above, this doesn’t mean you’re doing glute kickbacks correctly.
To become a pro, you’ll want to check out the pro tips and common mistakes below. By the end of reading these tips, you’ll have absolutely pristine form for your glute medius kickbacks!
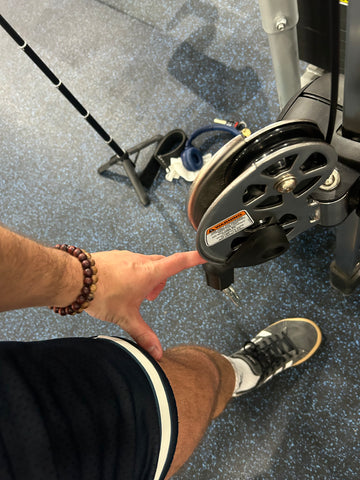
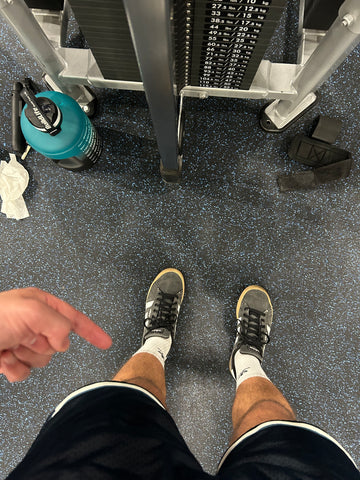
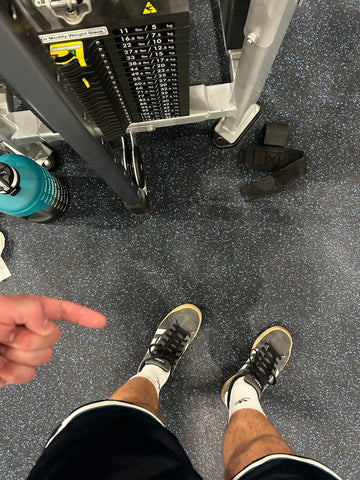
1. Choose an Ankle Attachment
When it comes to ankle attachments, you’ll find a few options depending on your gym.
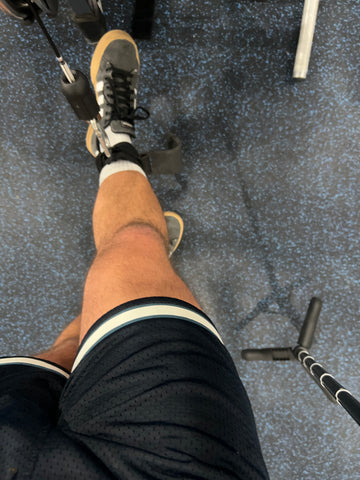
- Some ankle attachments strap around your ankle itself–usually with velcro.
- Some ankle attachments provide a pulley that actually goes under the shoe–connecting around your foot rather than the ankle itself.
I recommend going with the second option: the ankle attachment with the pulley under the shoe.
Why so?
These ankle straps tend to be:
- More stable: The positioning around your foot allows for more stability during glute medius kickbacks.
- Non-slip: Sweat can frequently cause ankle straps to slide up the leg during glute medius kickbacks, but this is a non-issue with the foot straps.
- More secure buckles: Most of these ankle straps have buckles, which allow for a more secure attachment around you than velcro.
2. Use Your Non-Working Leg to Set Up
When you initially set up for glute medius kickbacks, your non-working leg should be perfectly in line with the cable itself.
This means that your working leg will be slightly to the side, which will put it in prime position to work those glute meds!

3. Angle Those Feet!
As I mentioned before, when you position yourself at the machine, you’ll want to make sure your feet and toes are not facing the cable machine straight-on. Instead of squaring up to the machine, angle them out toward the working leg–about 30 degrees.
The reason for this is because this angle sets you up to more naturally cross your working leg over the non-working leg, maximizing the stretch you get in your glute medius and helping you bias this muscle.
4. Kick Out Diagonally
30 degrees is the angle of choice when it comes to gluteus medius kickbacks.
This also applies to the angle you use to kick your leg out. So, you’re not:
1) Kicking it straight back
2) OR directly out to the side
Instead, think about bringing your leg out diagonally at a 30 degree angle. (Shocker, I know!)
Why so?
When you kick your leg straight back–you’ll cause the cable to actually hit your leg as you return the working leg to the starting position, which can be majorly uncomfortable.
This position will also challenge any stability during the exercise.
When you kick your leg out to the side too much–you won’t target your gluteus medius!
5. Keep Your Torso Straight or Slightly Bent Forward
While you DO want to support yourself against the cable machine during glute medius kickbacks, you’ll want to avoid leaning over so far that your torso becomes parallel to the ground.
As soon as your torso gets so low during your glute medius kickbacks, you lose some of the great stretch you’ll get in the glute medius from a more upright torso.
That said, a slight bend is totally okay.
You can feel out whether it’s more comfortable for you to keep your torso totally straight or give it a slight bend forward. But either way, use that non-working arm to stabilize you throughout the motion.
6. Keep a Tight Core & Flat Back
Whether or not you choose to angle your torso slightly forward OR to keep it straight, the key to glute medius kickbacks is putting ALL the emphasis in those glutes!
The best way to do this?
A tight core.
And a flat back.
As soon as you take tension out of your core, your back will begin to curve, which can cause lower back pain.
One helpful tip is: Place your hand on the working side on your stomach during your glute medius kickbacks.
It can be super helpful to feel your abs engage during the movement, and your hand there can serve as a reminder to keep them working the whole time!
7. Keep Your Pelvis & Torso Stable
You’ll also find that without a tight core and flat back, your entire body will start to rock throughout your glute medius kickbacks, which is not ideal.
When your pelvis begins to wobble and move around during gluteus medius kickbacks, it can move into an anterior pelvic tilt position, which can cause lower back issues.
When your CORE is tight and your BACK is flat, you can keep your body still during the exercise, placing isolated emphasis on none other than your glute medius!
You may find that your pelvis and torso begin to move slightly towards the end of the exercise, which is normal. Just do your best throughout the motion to minimize extra movement here.
8. Start Steady
What I mean when I say this is to avoid propelling your leg out with too much force.
You’re not kicking a soccer ball or pedaling in a bicycle race.
This excessive force will cause your body to wobble around, minimize stability, and not place muscular emphasis on your gluteus medius.
Instead, move in a slow and steady manner through gluteus medius kickbacks.
9. Use Glute Medius Kickbacks as an Accessory Exercise
Since this is a super isolated motion that specifically targets your glute medius, gluteus medius kickbacks are ideal as an accessory exercise.
Meaning that it’s ideal to add this in to a workout day where you’re already working out your glutes through compound exercises (aka exercises that work multiple muscles at once–such as your glutes AND your legs)!
When you add an accessory exercise such as glute kickbacks into your routine, it helps add extra volume to the muscles you’re targeting, making this exercise an ideal exercise to really give your backside a boost!
10. Go Light on That Weight
Another common mistake people make during glute medius kickbacks is to go way too heavy on the weight.
Slow down your roll when it comes to the weight, and you’ll be in much better shape.
That’s because when the weight is too heavy, your body will again start to wobble during the movement, AND you’ll be tempted to rocket-start your kicks, which as we know by now, are NOT ideal for form and muscle work.
11. Ideal Reps for Glute Medius Kickbacks
That all might sound great, but you might be asking: “How many reps of glute kickbacks should I do?”
If you’re focused on gaining muscle mass in your glutes, I recommend sticking with 2-4 sets of 10-15 reps.
Back Pain During Gluteus Medius Kickbacks
Exercising your glutes isn’t the only important step in caring for this muscle.
In fact, the gluteus medius can often get:
- Tight
- Agitated
- And angry…
…causing sore lower back muscles.
A tight gluteus medius can pull your pelvis down, causing you to lose the natural curve in your lumbar spine. This can result in nagging lower back pain.
Best Massage Tool for the Gluteus Medius
So, if you're trying all these pro tips, but gluteus medius kickbacks are still causing you pain, you still have some options. Glute medius pain doesn't have to stop you from pushing it at the gym.
You can check out this glute kickback alternative, which uses a glute kickback machine for extra stability during the movement:
"Glute Kickback Machine: How to, Benefits, Pro Tips, Alternatives & Variations"
Personally, when my glutes feel like they're angry at the world, I use the QL Claw back muscle massage device to give my glutes a nice massage, Usually within minutes, they feel better, and I'm able to complete my workout without pain.
You might be saying, “But how do I massage my gluteus medius? It’s such a weirdly specific muscle.”
The Claw is intentionally designed to hit those hard-to-get muscles. In fact, our founder, Ben, designed it as the only tool on the market to hit all 5 muscles that tend to send lower back pain our way.
So, you may think your gluteus medius is hard to reach, but you’ll have no doubt you reached your gluteus medius once you try the QL Claw.
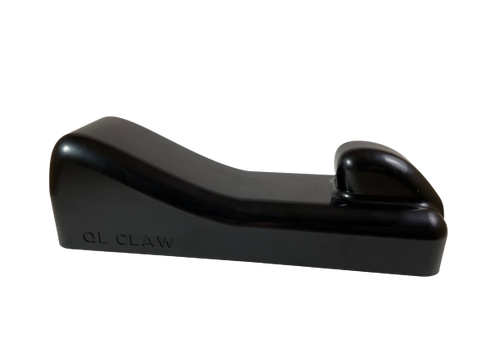
For help getting back into intense glute workouts, Check out the QL Claw HERE.


How to Massage Your Gluteus Medius
1) Place the trigger point (the smaller end) of The Claw at the top of your glute. Think about placing it at the highest part of your butt that still has meat. It’ll be approx. 3 inches from your side.
2) Allow your working leg to fall to the side.
3) You can then move this leg up and down in order to massage your gluteus medius. You can also use your non-working leg to rock your body up and down–another way to generate a great gluteus medius massage.
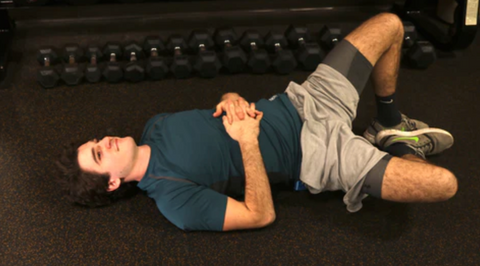
The QL Claw is the perfect way to show those glutes some love after working them out with the glute medius kickback.
For more tips on how to use The Claw for a great gluteus medius massage, check out the video below:
“Gluteus Medius Release & Pain Relief”
Glute Medius Resources
As I mentioned the gluteus medius often takes less center stage than the gluteus maximus, but it’s a very important muscle to strengthen. Working out your gluteus medius can help:
- Strengthen your overall glutes
- Prevent lower back pain
- AND help with aesthetics
Here are some of our other great resources all about the gluteus medius!
Glute Medius Articles:
"Leg Press For Glutes | How To Master The Glute Focused Leg Press"
"5 Lower Glute Exercises for a Backside Boost"
"Back Extensions for Glutes: Unlock Glute Gains With This Exercise"
Glute Medius Videos:
“Gluteus Medius Pain Explained [Low Back Pain Source]”
“Gluteus Medius Massage – A Secret To Lower Back Relief”
“Best Exercises For Gluteus Medius & Minimus (TOP 4)”
Glute Medius Kickbacks: FAQs
Do kickbacks work gluteus medius?
Glute kickbacks work your gluteus medius better than most exercises! It’s a perfect accessory exercise to boost those glutes!
What can I do instead of glute medius kickback?
Donkey kicks are a great alternative exercise for the glute medius kickback. This is a great way to perform something similar to the glute medius kickback at home–requiring no cable machine!
How do you strengthen your glute medius?
Glute medius kickbacks strengthen your gluteus medius and also provide aesthetic benefits to your glutes!
Should you go heavy on glute kickbacks?
Keeping weight lighter during glute kickbacks is better for form and helps you bias your glute meds!
How many reps of glute kickbacks should I do?
I recommend 10-15 reps and 2-4 sets of glute kickbacks.
Are kickbacks or step ups better for glutes?
Kickbacks are superior to step ups since they provide more muscle activation in your glutes than step ups. [1]
[1] https://www.ncbi.nlm.nih.gov/pmc/articles/PMC9362892/
[2] https://www.ncbi.nlm.nih.gov/pmc/articles/PMC7919354/
[3] Donnelly, Joseph M. Travell, Simons & Simons Myofascial Pain and Dysfunction: the Trigger Point Manual. 3rd ed., Wolters Kluwer Health, 2019.